12.26.2010

Serving Others

I am completely convinced that we are blessed in our lives with so much abundance so we can help others. I think home storage plays a similar roll. When we have an abundant home storage, then we can take our of our family's needs and still help those around us.

I want to wish you all a Merry Christmas and urge you find a way to help others during this Christmas season. Make it a family tradition! Our annual family service tradition brings the Spirit of Christ and Christmas into our home especially when selfishness threatens to prevail.

The first commandment is to Love God and "the second is like, namely this, Thou shalt love thy neighbor as thyself. There are NONE other commandment greater than these." (The Holy Bible, Mark 12: 31) I don't know of a better way to show love to God and our neighbors than by serving others. In fact, Christ was teaching us this principle when he said, "Inasmuch as ye have done it unto one of the least of these my brethren, ye have done it unto me." (The Holy Bible, Matthew 25: 40)

Be generous with your funds, time and talents. And be generous about the circumstances of others. Everything that we have comes from God. "Do we not all depend upon the same Being, even God, for all the substance which we have? . . . O then, how ye ought to impart of the substance that ye have one to another." (The Book of Mormon, Mosiah 4: 19, 21)

I know that Jesus Christ, my brother lives again. Merry Christmas!

12.21.2010

The Value of Nesquik

For the past few months, I have been cooking with a probably twelve year-old #10 can of Rainy Day instant powdered milk. I use it primarily for baking and I haven't had any problems with it. For the first time in years, we ran out of milk this morning. So, I made some up using my powdered milk.

Everyone raved over the peppermint cocoa served with the powdered milk just as they came in from a snowy morning of sledding. However, my four year old commented on his cup of straight milk served at dinner tonight, "Mom, this milk smells funny." I picked up my cup and cringed as I realized that I might not be able to stomach the milk either. After a mutiny by the entire family, I pulled out the Nesquik (which I used to know as Nestle Quik) to make "chocolate milk." Every time someone commented on the yucky milk, my teen-aged son would add an additional tablespoon-full to his glass. The Nesquik wasn't great, but the milk tasted worse without it.

I've always kept a few containers of Nesquick in my storage and I'll make sure to continue to do so for situations like this. This is also a good reminder to make sure that you taste and like the powdered milk that you choose to store for drinking. What you store for cooking matters less.

Click here for past posts on powdered milk.

11.23.2010

Homemade Ricotta


Part of being self-reliant is having the tools and skills to innovate in many different circumstances. Knowing basic recipes is one such skill that adds versatility to your home-storage. I love finding recipes that turn ordinary ingredients into something unusual. This is one of those recipes that I both want to keep on hand and that I want to share.


Homemade Ricotta
4 cups whole milk
2 cups heavy cream
1 teaspoon kosher salt
3 tablespoons good white wine vinegar

Set a large sieve over a deep bowl. Dampen 2 layers of cheesecloth with water and line the sieve with the cheesecloth.

Pour the milk and cream into a stainless steel or enameled pot. Stir in the salt. Bring to a boil over medium heat, stirring occasionally. Turn off the heat and stir in the vinegar.

Allow the mixture to stand for 1 minute until it curdles. It will separate into thick parts (the curds) and milky parts (the whey).

Pour the mixture into the cheesecloth-lined sieve and allow it to drain into the bowl at room temperature for 20 to 25 minutes, occasionally discarding the liquid that collects in the bowl. The longer you let the mixture drain, the thicker the ricotta. Transfer the ricotta to a bowl, discarding the cheesecloth and any remaining whey. Use immediately or cover with plastic wrap and refrigerate. The ricotta will keep refrigerated for 4 to 5 days. Makes about 2 cups.


Source:
I found this recipe by Ina Garten in The Costco Connection, November 2010, page 30.

10.27.2010

Canning Grape Juice


It's been a busy few months as we've harvested our garden. The tomatoes, potatoes and squash were a bust, perhaps because of a cool spring and early summer. But, we had an abundant crop of raspberries, peaches, and apples. We've canned peaches, made several different batches of fruit leather (which is already gone), and just recently I canned grape juice.


Grape Juice

1. Pick grapes.
2. Prepare quart bottles. I washed mine in the dishwasher on a sani-rinse.
3. Fill basin of steamer approximately 3/4 full of water.
4. Rinse grapes, picking out leaves or debris. Leave grapes on the stems.


5. Place grapes into steamer. Pack, but don't press.
6. Bring water in basin to a boil. Turn down to medium heat.
7. After about 50 minutes, you will be able to fill one or two still-hot quart bottles.
8. Place flats on full bottles and finger-tighten the rings.
9. Check water in basin. Refill if necessary.


10. After an additional 20 to 40 minutes, you should be able to fill approximately three or four more bottles. Place flats and rings.
11. Process in a water bath for 5 minutes (adjust for elevation). The USDA also adds sugar (which is optional) and an additional step of refrigerating, straining and reheating the grape juice before processing in order to reduce tartaric acid. The tartaric acid crystals don't bother me, so I skip this step. I add my own sugar when using the juice.

Here is a link to official recipes and water bath times: UGA - Grape Juice.


Also:
A. If you aren't going to strain the juice, don't stir or push the grapes or you will get a lot of debris in your bottles.
B. After filling my quarts, I did stir the grapes in the pot and then let it cook a little longer. I saved that juice to strain and serve that day. Approximately two total quarts were taken after the grapes were stirred.
C. I had an apple box and a full shopping bag full of concord grapes. It yielded about 20 total quarts.
D. We reconstitute our juice with a little more than a full additional bottle of water and 1/2 to 1 cup of sugar. Each crop of grapes is different. Adjust to your own taste.

10.02.2010

En Español

Veronica at El rincón de la preparación (The Preparation Corner) translated iPrepared's Three-Month Supply Worksheet into Spanish. Please pass this resource on to any Spanish speakers that would enjoy a copy of the worksheet or Veronica's blog (which is a wonderful preparation resource in Spanish). Thank you to Veronica for all of her work!

Here is the link:
Hoja de almacenamiento

9.22.2010

Grab-N-Go List (partial repost)

There have been a lot of fires here in the Western United States lately, including one not too many miles from my home this past week. Thousands of homes have been evacuated with little notice. I've read story after story about families not knowing what to save as they rush to leave their homes in order to be safe.

Today, I'm reposting a portion of a previous post on prioritized evacuation lists because it might be on your mind right now. It's worth a few minutes to make your own list now. It's tough to remember where things are and what you want to take when you're in a panic.

Please make sure to personalize your list. You'll want to locate copies of your list in multiple locations. Hang a list on your fridge and near each door for easy access.


Sample Grab-N-Go List:

Two Minutes:
Kids
Keys
Purse (check for cell phone)
Tennis shoes
Jacket/coat
Car

Five Minutes:
72-Hour Kits (hooks in garage)
Extra food kit (under coats in mud-room)
Bottled water (car trunks)
Both cars (pull out into driveway)
Vital Info Folder (includes birth certificates, insurance policies, etc.)
Cell phone chargers
Dad's medication
Additional cash

Ten Minutes:
[From this point on my list, I've included two columns under each time amount. The first column are survival items, the second column includes possessions that I want to save.]
Additional clothing (fill suitcases/bags with clothing as if packing for a trip)
Blankets (linen closet & beds)
Additional food (pantry)
******
Scrapbooks (office shelves)
Scrapbook bins (office closet)
Journals (office shelves)
Boys' journals (bedrooms)
Camera/video camera (M/D closet)
Family videos (M/D closet & entertainment center)

Twenty Minutes:
Flashlights/lanterns (basement)
Batteries
Tent (under stairs)
Radio (basement)
Camp stove (basement)
Larger water Bottles (basement)
Sleeping bags (under stairs)
********
Mom's portrait (over the piano)
Computer hard drive (pictures are already backed-up online)
Family pictures (on walls - already have digital backups)

One hour or more:
Portable Potty
Food storage
Air mattress
Shovels
Saw
*********
Dad's published books (office shelves)
Musical instruments
Contents of cedar-chest
Quilts


Some things that aren't on my personal list, but that you'll want to consider:
First-aid supplies (I've already included them in both my cars and our 72-hour kits)
Scriptures (also already in our 72-hour kits)
Pets and pet supplies
Medications
Fuel & generators
Eye glasses/contacts
Jewelry


For more information on creating your personal list, see a more complete post here: Prioritized Evacuation List.

9.15.2010

Fruit Leather

It's harvest time and I've got my hands full of extra fruit. Making fruit leather is an easy way to use up any fruit that isn't ideal for eating or canning. Here are my favorite two methods:

1) Hot Car Method
Make your fruit leather on a clear, hot day. It won't work if it's cloudy or too cool (less than 85 degrees). Puree any combination of fruit in your blender. Place parchment paper into a cookie sheet (cookie sheet must have edges). Spray parchment paper with Pam or wipe with vegetable oil. Pour pureed fruit onto parchment paper until it is about 1/8 to 1/4 inch thick. If it is too thin it will break apart too easily. If it is too thick, it won't dry. Park your car out in the sun. Leave your cookie sheets in the car. It might take two days for the fruit to fully dry. Finish drying in a low-temp oven if it hasn't dried after two days.

2) Dehydrator Method:
Puree any variety of fruit in your blender. Spray or wipe fruit roll-up trays with Pam or vegetable oil. Pour fruit into trays until full. Turn on dehydrator to recommended temperature. It takes about 24 hours until they are dry. Don't bother to roll and wrap with plastic wrap if your house is like mine. I made my first batch two days ago and it's already gone.

These trays have (clockwise from the top) peaches mixed with applesauce, only peaches, and strawberries mixed with applesauce. I add 1 T. of lemon juice per blender-full of puree to help slow browning. Applesauce is a great extender. I buy it in #10 cans at Costco for about $4.

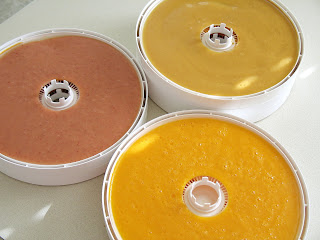
I dried this batch too long and it crackled apart. It still tastes good, but is harder to roll onto plastic wrap.


For more information: Dehydrating Foods At Home

9.09.2010

Fall Reminders


My kids have already headed back to school. My home is much more quiet and clean. You might find yourself with more time to address preparedness. Here are several suggestions for renewed efforts:


1) Keep working on your three-month supply.

You can use the iPrepared worksheet for a one-week supply or some other source. Resolve to at least make a menu this fall. It's so easy to drop a one-week supply menu into your purse or pocket to keep on hand for grocery trips.


2) Look for fall sales.

Here in Utah, the case lot sales are starting. Fellow preparedness blogger, Prepared LDS Family, has a fantastic comparison price sheet to help find the good buys. (I don't think that the Maceys sales have been added to her link yet.) Shopping sales is a great way to save a little money that you can then put towards your three-month supply.


3) Review backpack emergency kits.

My kids all have new bags, which means that their old pocket-sized emergency kits are either still in their old bags or have been thrown away. Back to school is a great time to refresh those supplies and make sure that your kids have a few necessities on hand.


4) Learn a new food preservation skill.

A lot of local produce is cheap right now as it is being harvested. It's also time to start picking fruit and vegetables from your own trees and gardens. A great self-reliance skill is to be able to provide and preserve your own fruits and vegetables year round. Local extension services often offer classes on food preservation techniques. Don't be overwhelmed by pressure cookers and canners. You can start by learning dehydrating and cold-storage techniques that can extend your harvest and don't even require special equipment, just a little knowledge.


9.04.2010

Lessons from New Zealand

After yesterday's 7.0 earthquake in New Zealand, power has been restored to the majority of homes. However, many of the residents are still without water. Many water and sewer lines were severed in the earthquake. Because of the sewage contamination, many backup drinking-water sources have also been compromised.

The New Zealand Herald is reporting that "There is a shortage of drinkable water in Waimakariri, mostly Kaiapoi. The Selwyn District has nearly returned to normal in urban centres but rural areas remain problematic. Rolleston's water is contaminated. Residents of Canterbury still advised to boil water prior to use, also to avoid recreational use of water as rivers have been affected with sewage."

We've seen this same scenario over and over in varied situations. Once the dust settles, the primary concern is water. Water sources are often compromised at best and non-existent at worst. Water supplies are already on their way to Christchurch, but obviously it is going to take some time to distribute it to those who need it.

So, what do I want you to do with this information? Store Water! You don't have to have special equipment - just a clean, empty soda bottle. Swish with 1 teaspoon of bleach mixed with about a quart of water, rinse well and fill with chlorinated water. Start now. In my opinion, it's the most important part of your home storage.

Past posts on water:
Two Weeks
Haiti
Prepared in Houston
Would I Have Been Ready?


Sources:The New Zealand Herald - Latest News Christchurch Earthquake
The New Zealand Herald - City Awakes to Billion-Dollar Aftershock
Safe Drinking Water (includes instructions for non-chlorinated water)

8.23.2010

Apologies

Sorry for the blank and random posts today. I often work on a post for several months. I post date the entry while I'm working on it. Sometimes, those posts sneak up on me and publish without being finished (or even started).

8.11.2010

My Three-Month Supply

This is a one-week supply for our family of five (which includes two teenage boys).*

Think it takes too much space to store a three-month supply? This is the same one-week supply as above with everything stacked. It doesn't take much space at all!


Hopefully with the Three-Month Supply Worksheet that I posted a few weeks ago, you've been able to find out that gathering a three-month supply is much easier than you'd imagined - especially if you work at it one week at a time. Though you should not use my menu (and should only include what YOUR family eats), I know that sometimes seeing someone else's plan can help you to scrutinize your own eating habits and develop a successful menu for your own family. So today, I'm including an example of my own Three-Month Menu Plan.


Our Three-Month Supply Menu
Multiply these one-week amounts by 13 for a Three-Month Supply

Breakfast
Monday - Cereal/Milk
Tuesday - Oatmeal/Juice
Wednesday - Pancakes/Milk
Thursday - Cereal/Milk
Friday - Oatmeal/Juice
Saturday - Pancakes/Milk
Sunday - Cereal/Milk

Lunch
Monday - Mac-n-Cheese/Juice
Tuesday - PB & Honey Sandwiches/Milk
Wednesday - Jambalaya/Milk
Thursday - PB&J Sandwiches/Milk
Friday - Pizza/Juice
Saturday - Chicken Salad Sandwiches/Pickles/Juice
Sunday - Easy Soups (Spaghettios, Soup, Raviolis, Chili)/Milk

Dinner
Monday - Taco Soup/Mandarin Oranges/Milk
Tuesday - Pasta with Meat and Marinara Sauce/Peas/Peaches/Milk
Wednesday - Burritos/Apple Sauce/Milk
Thursday - Black Beans and Rice/Mandarin Oranges/Corn/Milk
Friday - Wild Rice Soup (includes carrots), Peaches, Juice
Saturday - Chicken Alfredo and Pasta/Peaches/Corn/Juice
Sunday - Curry Chicken/Peas/Apple Sauce/Milk


Note: These are selections from our family menu that are a part of our normal, daily diet. That doesn't mean that we eat all of these items every week. I've picked these particular meals because they store well and we eat them often enough that they are familiar and can be easily rotated. For example, I probably serve Taco Soup about once every-other month - or 6 times a year. I've stored 13 meals-worth of Taco Soup for our three-month supply. We eat it regularly enough that I would be able rotate through all 13 servings in about two years -- well within expiration dates. My family likes it enough that they would be happy to eat it more often if needed.

Also: Our day-to-day menu includes a lot of fresh fruits and vegetables. This menu does not reflect that fresh produce, but instead only includes preserved produce or canned items which we also use. We grow a garden, berries and fruit trees and I count on these to be part of my three-month supply. I plan to add more fresh fruits and vegetables to these menus as it is available.


*Picture is missing a small bottle of mayo, one can of cream of chicken soup, one can of chicken broth, and an additional box of cereal.

8.06.2010

Prioritized Evacuation List (Grab-N-Go)

Lisa recently wrote,

"I live in Southern California and recently we had a wildfire very close to homes and a lot of my friends had to evacuate. They gathered most of their important documents and scrapbooks and things. But while staying away from their homes, all they could think about was what they had forgotten. So we have all been trying to come up with some (kind) of "evacuation list" to be prepared for any other situation like this. Do you have any ideas for this or any resources that we can turn to?"

I think it is a great thing to have a prioritized evacuation list. In a stressful situation, it can be hard to think clearly. If you have a list, you can rely on it to remind you of important items without stressing that you're forgetting something. You'll want to locate copies of your list in multiple locations. Hang a list on your fridge and near each door for easy access.

Each family's list is going to be different. Perhaps a certain toy is essential to comfort a toddler in your family. For your family, that toy will need to be towards the top of the list. A different family might have a special family portrait that is important to save.

Every evacuation situation is also going to be different. You might only have two minutes or you might have twenty minutes to gather items. I've broken my evacuation list into time amounts, guessing what I can gather in that amount of time. If my guesses are wrong, I'm still okay because the list starts with the most important items and moves to less important items. I've also included the location of each item. Listing the location will save precious time as it reminds you of where things are and saves you from describing the location to anyone else who might be there to help.

In an actual evacuation, you might choose to skip items on the list depending upon the situation. In a fire, you would probably choose to skip things like sleeping bags and tents, knowing that you will have family, a shelter, or a hotel available to you and instead concentrate on getting valuables out of your home. In an earthquake, your priority might be gathering survival items and food out of a broken home before another aftershock hits. In a gas leak evacuation, you'll just be trying to get out as fast as possible with only absolute necessities. It's impossible to predict when you might need this list or what the circumstance will be. So I've made one easy-to-find list that I can adapt accordingly.


My Grab-N-Go List:

Two Minutes:
Kids
Keys
Purse (check for cell phone)
Tennis shoes
Jacket/coat
Car

Five Minutes:
72-Hour Kits (hooks in garage)
Extra food kit (under coats in mud-room)
Bottled water (car trunks)
Both cars (pull out into driveway)
Vital Info Folder (includes birth certificates, insurance policies, etc.)
Cell phone chargers
Dad's medication
Additional cash

Ten Minutes:
[From this point on my list, I've included two columns under each time amount. The first column are survival items, the second column includes possessions that I want to save.]
Additional clothing (fill suitcases/bags with clothing as if packing for a trip)
Blankets (linen closet & beds)
Additional food (pantry)
******
Scrapbooks (office shelves)
Scrapbook bins (office closet)
Journals (office shelves)
Boys' journals (bedrooms)
Camera/video camera (M/D closet)
Family videos (M/D closet & entertainment center)

Twenty Minutes:
Flashlights/lanterns (basement)
Batteries
Tent (under stairs)
Radio (basement)
Camp stove (basement)
Larger water Bottles (basement)
Sleeping bags (under stairs)
********
Mom's portrait (over the piano)
Computer hard drive (pictures are already backed-up online)
Family pictures (on walls - already have digital backups)

One hour or more:
Portable Potty
Food storage
Air mattress
Shovels
Saw
*********
Dad's published books (office shelves)
Musical instruments
Contents of cedar-chest
Quilts


Some things that aren't on my personal list, but that you'll want to consider:
First-aid supplies (I've already included them in both my cars and our 72-hour kits)
Scriptures (also already in our 72-hour kits)
Pets and pet supplies
Medications
Fuel & generators
Eye glasses/contacts
Jewelry

Did I miss anything? Please share if you have an idea of something else that might need to be included in these lists. Thanks!


Here are some other examples and ideas:
Prepared LDS Family - List
Rim Family Services
Natural Disasters Evacuation Possessions Survival
Mountain Living

7.23.2010

Mylar Blankets (and the importance of being prepared while hiking)

Last week I sent my son to scout camp. His leaders gave him quite an extensive packing list. We generally complied, but I admit that I thought the list was a bit over the top -- especially the day-pack list. One item on his list was a Mylar Blanket (also known as a space/emergency/first-aid blanket). I had stored one of these blankets in each 72-hour kit, so I just grabbed his and threw it in his backpack.

We were surprised to find out that during the mid-week hike they got "lost" and had to use their day-packs to spend the night under the stars. [This was completely planned and was part of the scouts earning their Wilderness Survival Merit Badge.] My son had a well-packed day-pack, including long pants and a jacket.

Temperatures plummeted as it got dark (summer lows in the area average around 50 degrees). The boys put on their jackets and hats and then pulled out their emergency blankets. My son described the blanket as being way too little (he is 4' 10"). The blanket was only big enough to wrap completely around his upper body. He indicated that complete coverage was important as any gaps in the blanket allowed the cold air in and negated any warmth added from the blanket. Their scout leader also brought trash bags for each boy to use. My son felt that he really needed two mylar blankets and two trash bags to stay "barely warm." By 3:00 a.m. it was clear that the boys (especially those in shorts) weren't going to stay warm with just the supplies on hand. So they packed up and hiked back to camp where they all promptly snuggled into their warm sleeping bags.

In contrast, it was interesting to hear a cousin relate the story of his scout camp just weeks earlier. A group of 19 scouts and several leaders got lost in the Washington mountains while hiking. In that large group of scouts, only one scout had matches and food (a bag of goldfish). Temperatures dipped below freezing and it snowed that night. Thankfully, they had those matches and were able to build a single fire (too little dry wood for more). They were found the next morning. No one was permanently harmed. Unfortunately we stories like this all too often.

The moral?

Always, always, always be prepared for getting lost - even on day hikes!

(and) Rethink your use of emergency blankets. If my 12 year-old son needed more than one, I'm certain that the adults in our family would need even more. I've seen the "sleeping bag" style and might give those a try. However, I honestly don't think they would work for the larger adults in our home. I think I will add several mylar blankets to each 72-hour kit and to my car kits. I'm also going to add some garbage bags to those kits.


7.15.2010

Charcoal

[I've been offline because we've been on vacation to Colorado for a family reunion. We had a great time! I hope you're having a great summer.]


Right now is a great time to purchase charcoal. You'll know that you've found a great price on charcoal if it is less than $.22 a pound. You get roughly 16 - 18 briquettes per lb. You can cook roughly 32 dutch oven meals for around $11 (24 briquettes for a 10 inch dutch oven). Charcoal is the "least expensive fuel per BTU that you can store." [1]

When stored, charcoal absorbs moisture easily and then doesn't light or burn well. You can prevent moisture from getting into the charcoal by storing it in an air-tight container. If properly stored, it can last indefinitely. [1] Charcoal can be easily stored in food storage buckets or used laundry buckets. You can lengthen the storage life of charcoal and increase the convenience of using it by sealing smaller quantities in food-saver bags and then storing those bags in your bucket. I plan to store the amount of briquettes I need to achieve 350 degrees in a dutch oven. This amount varies depending upon the size of your grill or dutch oven. Read here for more information.

You probably also want to store newspapers or lighter-fluid in order to light the charcoal. A chimney makes starting the charcoal a lot easier. I would also recommend purchasing a dutch-oven, volcano stove, and/or charcoal grill. These are uniquely suited to cooking with charcoal.

You should never, never, NEVER use charcoal indoors (or even in an open garage)! Charcoal creates a lot of carbon monoxide and will kill you. Always use it outside.


[1] Jones, Jonathan and Kylene; Cooking and Lighting with Alternative Energy, American Fork West Stake Home Storage and Preparedness pamphlet.

6.26.2010

More for Preparedness/Home Storage Specialists

Those of you who are also serving as Home-Storage or Preparedness Specialists might be interested in a document that we created for training the ward specialists. Instead of linking to a pdf, I'll just give you the text:


Ward Food Storage Specialists

Main Objective:
Teach and assist families to become self-reliant in home storage.

Current Focus: Make a renewed effort at the ward level to help every family gather a three-month supply.

"President Hinckley clearly recognized that change and adaptation are needed so that all of us might benefit from the Lord’s inspired program." (Evelyn Jeffries, Family Home Storage, A New Message, Ensign, March 2009)  

"This new approach asks us to do the best we can, even if all we can do is to set aside a can or two each week. If the prophet asks us to do something, we can find a way to fulfill the commandment and receive the blessings." (Dennis Lifferth, managing director of Church Welfare Services)  

"This new program is within everyone’s grasp. The first step is to BEGIN. The second is to CONTINUE. It doesn’t matter how fast we get there so much as that we begin and continue according to our abilities." (Bishop H. David Burton)


Some possible tools that can help you accomplish this within your wards:

1. Work with your Bishopric. Seek and follow their direction.

2. Reach out specifically to the 80% of your ward that have NO storage.

3. Simplify. Make things as simple, understandable, and accessible as possible.

4. Emphasize storing foods that are already a part of each family’s "normal, daily diet" (Safely Gathered In)

5. Gain personal experience by making a plan for your own family to gather your three-month supply.

6. Meet with individuals or small groups in your ward (those who don’t already have a three-month supply) and assist them in developing a personal plan for gathering a three-month supply. The Three-Month Supply worksheet can be used as a tool to develop plans.

7. Have blank copies of the worksheet available so that families can make additional copies for future use if desired.

8. Enlist the help of Visiting Teachers and/or Home Teachers when working with inactive members. They might be able to take the message and worksheet to these families with greater success.

9. Remind and encourage each member to gather a one-week supply. Then encourage them to expand their storage to three-months as soon as they are able.

10. Use announcements in ward bulletins, ward newsletters, and in ward auxiliaries to inspire, remind, and motivate.

11. Be a broken record in reminding members about the importance of getting a three-month supply.

6.22.2010

Many Ways to Approach a Three-Month Supply


“The first step is to begin.
The second is to continue.
It doesn’t matter how fast we get there so much as that we begin and continue according to our abilities.”


Obviously there isn't just one way to plan a three-month supply. Here are several different methods. Choose the method that works best for you (or make up your own) and begin!

Use a three-month calendar. Plan three months at one time.
Use a one-month calendar. Repeat three times.
Use the one-week worksheet, but use it to create two different menus. Alternate.
Purchase one extra meal or one day's menu each week when you go shopping.
Buy double of everything when you go shopping.


Here are some planning forms that might help you:
*Gathering Your Three-Month Supply (one week at a time worksheet) - by iPrepared
*3 Month Food Supply Excel Worksheet - by Food Storage Made Easy
*3 month food supply plan with printable forms - also by Food Storage Made Easy


How have you planned for a three-month supply?

6.18.2010

We Can Begin With a One Week's Food Supply


We can begin ever so modestly.
We can begin with a one week's food supply and gradually build it to a month, and then to three months.


There was some confusion as we introduced the Three-Month Supply worksheet at a Relief Society Meeting this week. Some thought we were teaching the need for a one-week supply and abandoning the idea of a three-month supply. We had to clarify that this worksheet is just the first step to gathering a three-month supply. This quote by President Gordon B. Hinckley has been the inspiration for the development of our plan.

6.14.2010

Three-Month Supply Worksheet

[If the link above doesn't work, go here and click on the worksheet graphic which will give you a picture file.]

This worksheet will help you make a plan for gathering one week's worth of food for your family. A step-by-step list of instructions is included on the worksheet. In a nutshell, make a menu plan for one week and determine which products you need to have on hand for those meals. Purchase a few extra items each time you go shopping. Pretty soon you'll have a one-week supply!
Once you've gathered one week's worth of meals, continue purchasing extra food. Repeat the worksheet four times for a one-month supply. Repeat 13 times for a full three-month supply. It's easier than you think!


[FAQs] Frequently Asked Questions:

How do I know which meals to include?
As you plan your menu, it is important that include meals that are a part of YOUR "normal, daily diet"1 (including canned and commercially packaged foods).2 This isn't the time to include someone else's recipes or plans. These don't have to be "food-storage foods." Store what YOU eat.

What if I have more meals that I want to include in my three-month plan?
Make several copies of the worksheet. Label each week as Menu A, Menu B, etc as desired. You can repeat your one-week plan thirteen times to achieve a three-month supply or you can create a variety of menus and repeat in order to have 13 weeks total.

What types of meals are easier to store?
It's almost easier to talk about which foods don't store easily. Most fresh fruits and vegetables perish quickly. Maybe you often have grapefruit for breakfast. Because grapefruit only lasts for a month or so in ideal conditions (and can't really be frozen, dehydrated, or bottled), this meal might not be a good candidate for three-month supply storage. (Regularly planting a garden is a good way to plan for fresh fruits and vegetables in your menu.) On the other hand, if you enjoy eating oatmeal for breakfast, the supplies necessary for preparing this meal can be stored for at least three months.

What about infants?
If your infant drinks formula, you'll want to include that in your plan.

Should my meals be easy to cook without electricity?
I have based this worksheet on The Church of Jesus Christ of Latter-day Saints' directions for a three-month supply. They have not indicated a need to store foods that can be cooked without electricity. You have to decide what is best for your family. Just remember that the meals you store should already be a part of your "normal, daily diet."1

Can I plan to store things in my freezer?
There are foods that can be easily stored in your freezer and rotated into your three month supply. If you are concerned about not having electricity, see the question and answer above.

Should I include water?

Water is essential to survival. Water storage is one of the four major components found in the new recommendations for family home storage from The Church of Jesus Christ of Latter-day Saints.1 Though it is not specifically included in this worksheet, it is important that your family also store water. Water can easily be stored in soda bottles that have been washed out and sanitized with a combination of a little bleach and water.

What about toiletries?
The main purpose of this worksheet is to help you store food that is a part of your normal, daily diet. If you feel like you would like to also store things such as toilet paper, toothpaste and shampoo for your family, that would be fantastic - but again, it is not the focus of this worksheet.

What if my diet is only fresh fruits and vegetables?

This question is the most difficult that I've had so far. If your normal, daily diet only includes fresh fruits and vegetables, then I would strongly suggest that you plant a garden. A garden would enable you to supplement those fruits and vegetables for much of the year (maybe even year round depending upon the climate). If you are open to dehydrated or home canned produce, you can store your own fresh fruits and vegetables year round.

In order to store a three-month supply, you may have to highly scrutinize your menu and look for any items that can be stored and rotated. It might be more difficult, but it isn't impossible. You might choose to store foods/meals that would be acceptable in tight circumstances. Then, plan to donate any stored items that you haven't used to the food banks in your area prior to expiration dates.

Sources:1 - The Church of Jesus Christ of Latter-day Saints, Safely Gathered In, Three-Month Supply. (Text; PDF; Multiple Languages)
2 - The Church of Jesus Christ of Latter-day Saints, Provident Living,
FAQs

Copyright - 2010. You may make copies of the "Gathering Your Three-Month Supply" worksheet for your own personal use or for church use. If you link to this worksheet on your website or blog, please also include the link for this post on iPrepared and give appropriate credit. Link: http://iprepared.blogspot.com/2010/06/three-month-supply-worksheet.html

6.06.2010

Preparedness Outreach Ideas

In my last post, I asked for ideas from you about how to help single parents become prepared. I received this fantastic email from Jennifer. She has given me permission to share her ideas.


"I love this! As the parent of a baby, it was parenthood that made me get serious about “preparedness”. Sure, we always had some stuff around, but becoming a “Mama Bear” made me realize that I fiercely want to protect my Baby Bear, and make sure that he always had what he needed. Single Moms have so many more things working against them including lacking that partner. This would be my approach:

Map out a series of steps based on immediate needs for an emergency. Have a buying plan for an extra $10/week.

1.) Storing Water:
Have a soda bottle drive at your church. It doesn't cost a thing! Just by announcing the collection, you’ll have people thinking about their own water supply. You can’t make it more than ~ 3 days without water. This would be my first step because it’s free. For the next big holiday (4th of July?) ask members to buy their soda in plastic bottles for their party and bring them in when they’re done.

2.) 72-hour kit:
Make up a list and an approximate cost. Make the list in phases of “essential” (water, food, flashlight), “like to have” (extra shoes, toiletries, etc.). Perhaps a “drive” in the church for unused kids backpacks and bags? Have the kids make up a 72-hour kit in Sunday School. Moms might not accept charity for themselves, but they won’t say “no” to something that will benefit their children. I know I wouldn't. (Around here we have a chain of stores called “*****”. They often have “free with rebate” items, and backpacks are a big item. Other times they’re $0.99 with rebate.) Also the little “drawstring” backpacks are <$3 online. Combine it with Biblical stories – Joseph, the 10 virgins, Noah, etc. Fill it with what kids could reasonably fit and carry – 6 bottles of water, granola bars, fruit cups, pudding etc. It’s a start.

3.) Lifestyle Issues:
Getting out of debt, savings, living within your means, etc. Real resources and problem solvers for issues at home (eliminating cable, Netflix, etc.). Smartly using a credit card. Having a garage sale. Scoring great kids items at other garage sales. Free entertainment (think public library instead of the movies). Trading child-care services with other parents instead of paying a sitter. Advertise local resources - WIC, school programs, etc.

4.) Helping your moms get their 3-month-supply:
Compile Easy Recipes – Sure we’d all like to whip up a Martha Stewart meal every night, but busy moms need recipes that are tasty, easy and can eliminate the frozen convenience foods (pizza, etc.) “30-Minute-Meals” sound appealing, but a 10 minute prep then throw in the oven/crock pot is even better. 20 minutes not in the kitchen, is 20 more minutes with the kids. Also focus on one-pot meals for easy cleanup. From this list, compile a 2-3 week menu rotation that is diverse and nutritionally complete. Multiply by 4-6 for 12 weeks (3 months). Yes, I know about having wheat and grinders handy, but initially, this is a lot for a single mom to swallow. She doesn't have time to shower, so she’s not whipping up home made bread. Am I right?

My faves: Cheap Baked Beans - can of pork and beans, ketchup, mustard, and brown sugar. Heat on the stove. Serve with hotdogs bought on sale and frozen. :) Baked chicken breasts with Dijon mustard and crushed saltines on top. Pasta & Sauce (boil pasta, drain, then add sauce in same pot, and heat) Easy peasy

Create a recipe booklet with the ingredients in a standard format to inventory ingredients. Include substitutions or extras. Along-side, create a master ingredient list for the 3 months of meals. This could be a great thing to “sell” at church, allowing the proceeds to help fund other phases of your endeavor. Include a mini-sharpie with the cookbook and encourage people to write the purchase date on their canned goods if there is no exp.

Start a coupon exchange at church. Lots of people get the big Saturday/Sunday paper with coupons. Some people just throw out the coupons. Formula and diapers are a big one to save on. Moms have to have those.

5.) Maintaining emergency supplies, rotating stock, establishing a long-term storage:
eNewsletter with hints and tips – Amazon has diaper prices that are competitive with Babies R Us AND they ship for free. Timesaver! Remind your moms of what they can do with their $10 that week: 10 boxes of Mac N Cheese. 5 jars of pasta sauce. Discuss building an emergency car kit before winter cold or summer heat. $10 should cover new batteries for smoke and CO detectors each fall and spring – a wise investment. Talk about squirreling away $10 in the car for emergency gas, $10 away in the 72-hour kit. An extra $10 on the credit card bill. Discuss this Tylenol recall and the benefit of diversifying supply sources. (Our stores were out of generics, too!) I’m thinking about the peanut recall, too.

Move on to longer-term storage dehydrated vs. freeze dried. Educating your readers instead of giving instructions will help them to think about how they can attain these goals within their own situation. Don't forget to include your single moms in the giving back! They'll have kids clothes that are outgrown or toys that they no longer need. They can donate them too."


Thanks Jennifer for all of your fantastic ideas! I shared some of these ideas at a recent brainstorming meeting and our Stake is already talking about doing a soda-bottle donation drive.

5.27.2010

Home Storage Specialists 2

I met with our Stake President last night and received an additional calling. I am now serving as the "Assistant Stake Home-Storage Specialist." For those of you that would like me to say that again in non-religious terms: I'm now one of two main people responsible for teaching home storage principles to a group of over 4,000 people.

Like I said in an earlier post, I've had some responsibility for the ward (about 100 families) application of home-storage principles. But this is obviously much bigger. Our leaders want us to emphasize getting a three-month supply. They want us to make things as simple and accessible as possible -- and don't want us to cater only to food storage "hobbyists." We have also been encouraged to find ways to reach out to the single mothers in our area (for whom home-storage might be particularly overwhelming).

I just sat and wrote down a list of my ideas. This list is just a beginning. There is a lot of praying still to do in regards to what Heavenly Father wants us do. I've shared a similar list before, but this one has my own Stake's objectives in mind. I thought I would share it with you even though much of it is a repeat.

Some of you have had similar responsibilities before. I would love to hear your thoughts and ideas. I would especially appreciate any ideas on helping the single mothers to acquire their three-month supply.


Short Term:
*Meet with leaders to discuss the goals and objectives of the stake.
*Be a broken record about the three-month supply.
*Make retraining the ward home-storage leaders a priority.
*Set up a communication lines with the ward home-storage leaders.
*Eliminate the stake workshops - encourage the new program to be taught at the ward level.

Medium Term:
*Attend Bishopric training and RS training and present a message about the importance of the three-month supply. Encourage them to emphasize this in their wards and support their ward "home storage" leaders as they try to do so.
*Offer to teach fifth Sunday lessons or Additional RS Meetings as needed or encourage use of ward home storage leaders to teach these lessons.
*Set up an email newsletter (OR set up a paper newsletter) to go out to the wards anywhere from monthly to quarterly.
*Develop a worksheet that simplifies (walks you through) the process of getting a three-month supply.
*Place motivational quotes/reminders on the bulletin boards in the different building RS rooms.
*Contact (or encourage ward home-storage leaders to contact) those in charge of printing bulletins and ward newsletters. Have them include motivational quotes and reminders about a three-month supply.
*Provide outlines for FHE lessons to support the family in teaching these concepts.
*Create a description page and schedule for families who want to reserve stake canning equipment.
*Encourage ward home-storage leaders to volunteer to meet with individuals and/or small groups and help them as needed.
*Help ward home-storage leaders to know about new information including Ensign articles.

Long Term Ideas:
*Maybe do a every-other-year home-storage fair - emphasizing the new program.
*Coordinate and carry out a Stake emergency simulation.

5.20.2010

Wheat Grinder Owner's Manuals

You know that you should always read your owner's manuals, right? Well, so do I - but I don't always. I didn't read my owner's manual for my wheat grinder. If you had asked me 20 minutes ago, I would have told you that I knew how to use my grinder without any hesitation. Today, I found out that I was wrong.

Earlier this week, Crystal at Everyday Food Storage posted a video showing how to correctly use a Blendtec Wheat Grinder. I was drawn to watch because it was the same wheat grinder that I use. And guess what? I haven't been using it correctly. Like Crystal, I thought that the cup that came with was just measuring cup. It turns out it has a functional purpose.

So, I encourage you to read the manual for your electric grinder. You might discover some information that you've been missing.

Don't know where to find the manual? Here is a list of several online sources:
*K-Tec/BlendTec Mill - Crystal's Video;
*Wonder Mill - PDF; Video
*Nutrimill - PDF; Video
*L'Equip Vitalmill - PDF

5.17.2010

Fat Pantry

I don't know who coined the term, fat pantry, but I'm a believer in this concept. Don't know what a fat pantry is? Let me explain:

A fat pantry is a pantry (or shelves, cupboards or whatever) where you keep a large stock of foods that you regularly eat. I've heard some call a fat pantry their own personal store. The idea is that you stock up when items are on sale (or regularly if it's something that never goes on sale) so that you always have several of an item on hand. Then you can shop out of your own pantry.

This is the way my mother shopped. She could make hundreds of recipes on the spot without having to go to the store because she had shelves full of things that she regularly used. In fact, I only remember a handful of times that she had to purposefully pick up something at the store for a recipe. She just always had one of everything on hand.

Now, I use the same method in my own home. It's taken some time to get a well-stocked or fat pantry. But I try to have some of everything on hand.

There are so many great things about using this method. First, I am able to always save money on my groceries -- I rarely have to run to the store (and use gas) to get an item that is likely not on sale. I buy a lot of my foods on sale -- and when it is discounted I stock up. The second great thing about this method is that I am never locked into a menu. Planned for enchiladas, but really in the mood for wild-rice soup? No problem - ingredients for both are usually on hand. I can make the majority of my favorite recipes right now because I have all of the ingredients in my "fat" pantry.

Finally, if you think about it, a fat pantry can also be a three-month supply in disguise. A three-month supply is an important part of a good family home storage plan. I recommend following the family home storage plan outlined by The Church of Jesus Christ of Latter-day Saints. In their plan, a three-month supply is just one of four important steps in gathering a complete home storage. By having a full fat pantry (three-month's worth) you can complete this part of the storage plan. You also gain some of the promised blessings of peace by knowing that your family is better prepared.


Do you have a fat pantry? How do you make it work for your family?

5.03.2010

Rotating Emergency Kits


I always intend to rotate my emergency kits each year, but I don't always get around to it. Obviously that makes my kits less effective. In fact, you can read about my past 72-hour kit failure here. We currently keep the bulk of our emergency-kit food in a separate bag just inside the back door to reduce any spoiled food from the extreme temperature in our garage. Each person also has their own backpack, stored on hooks in the garage, with a little bit of less-perishable food in addition to this main bag.

Determined to create a new habit of rotation this year, I decided to follow some advice given by others and connect it to general conference and make a family tradition out of rotating the contents of our emergency kits. This could also be a fun Family Home Evening activity, especially if it was paired with practicing a preparedness skill such as an earthquake or fire drill.

Early last month I informed my family that we would be serving lunch from the food in our food-emergency-kit. Honestly, there was a lot of moaning and groaning. But I was determined. I let them choose anything from the kit. Well, that's not completely true. My twelve-year-old would have eaten just Tootsie Pops if I had let him.

My husband chose a tri-tip roast Compleat (which is a shelf-stable meal). He warmed it up and lamented that it probably wouldn't taste very good cold. My oldest son chose beef jerky, which was completely predictable. In fact, I had packed it just for him to eat because I didn't think he would eat anything else. My youngest two had a can of vienna sausages each. I had a Sensations tuna kit. We all shared a can of mandarin oranges and one of pineapple.

I know - no veggies. I actually don't store any extra vegetables in my kits. I've thought about this and figure that my kids resist eating veggies normally, so I'm pretty sure that they wouldn't eat them in an emergency (consequently taking valuable storage space). Plus, I figure that they'll be fine without veggies for three days.

I learned some important lessons as we ate our food. First, my tuna was spicy Thai - and boy was it spicy! I really needed some milk to dilute the spiciness, but only had water. So I won't be including spicy foods in the future. Second, the emergency kit was really heavy. I will probably chose fruit cups instead of pop-tab cans in the future - just to lighten the weight. Third, I realized that it would make more sense to include some plates and utensils in the food kit instead of just in the individual kits. Last, I concluded that we really needed more variety in the kit. My kids suggested including small cereal boxes. My husband suggested replacing the Compleat with a flavored tuna fillet which would taste better cold. As I shopped to replace the items we ate, I also added some crackers and a jar of peanut butter/jelly. I would really prefer to store individual restaurant packs of the peanut butter and jelly but I haven't been able to find any.

So - some good lessons learned. And even though they complained, I think it was a fun (or maybe just unusual) way to rotate the contents of our kits. It was an extremely valuable experience for me.


When/How do you rotate your kits?

4.20.2010

Wheat Prices

Just a heads up -

Updated August 2011 hard wheat prices (per pound):
$.36 - Maceys, Auguson Farms, 45 lb. bucket ($15.99) - recent sale price.
$.42 - Costco, Lehi Mills, 45 lb. bucket ($18.**)
$.46 - Family Home Storage Center (LDS Cannery), 25 lb. bag - needs to be repackaged.
$.60 - Family Home Storage Center (LDS Cannery), #10 cans.
$.86 - Honeyville Grain, 50 lb. bag - needs to be repackaged, shipping is $4.49 extra. ($.78 for bulk orders)
$.99 - Emergency Essentials, 45 lb. super-pail (lined with mylar bag), shipping is extra. ($.84 for bulk orders)


2010 for comparison (per pound):
$.23 - Family Home Storage Center (LDS Cannery), 25 lb bags - needs to be repackaged.
$.29 - Maceys, Morning Moo, 45 lb. bucket ($12.99 - sale may end on Wednesday).
$.30 - Costco, Lehi Mills, 45 lb. bucket ($13.50).
$.45 - Family Home Storage Center (LDS Cannery), #10 cans.
$.82 - Emergency Essentials, 45 lb. super-pail (lined with a mylar bag), shipping is extra.
$.89 - Honeyville Grain, 50 lb. bag - needs to be repackaged, shipping is $4.49 extra.


What are the prices of wheat in your area?

4.19.2010

Solar Lights

Recently the Eastern United States had quite a winter storm. I read a personal account of someone who was experiencing that storm along with an extended electricity outage. They brought their solar landscape lights inside each evening to add light to their home without using up their flashlight batteries or candles. What a fantastic idea!

I recently purchased some new landscape solar lights for our home. I love that I could easily twist the top off of the stakes and have an instant source of light. I would have to make sure that the solar panels were cleared of snow during the day to make this work during the winter. Some landscape lights are fully attached to their stakes and would have to be fully removed - but it would still work.


Note:
I wish I could remember the blog where I originally read this idea. If this personal account came from you, please send the link and I'll give credit where credit is due.

4.12.2010

FHE Scavenger Hunt

Not sure what to do for Family Home Evening tonight? I love this idea from Prepared NOT Scared! for a Family Home Evening Scavenger Hunt. The hunt is actually set up for families in her ward, but it could be easily adapted for each member of your family to do separately (or as pairs with little ones).

Here's a link:
Safety & Emergency Preparedness Scavenger Hunt

4.05.2010

Earthquake Preparedness Week

It's Earthquake Preparedness Week here in Utah. And it's a great time to evaluate your earthquake preparedness even if you don't live in Utah. Experts have stated that California, Arizona and/or Mexico might experience a 6.0 magnitude aftershock1 (following yesterday's 7.2 earthquake) in the next few days. So, if you live in these areas, it might pay off to review any emergency plans with your family. You might also feel motivated to update any emergency kits that you have stored.

The State of Utah has prepared a website with many preparedness tidbits. Here are a few highlights from that site that I wanted to share:

*Be Ready Utah (the main website)
*Kids Activity Book (This could be a great workbook for Family Home Evenings or teaching preparedness. The activities are geared primarily for ages 8 to about 13.)
*Tips for Preparing Children (has a section about infants and another about younger children)
*Organizing Your Neighborhood (has some great ideas for wards and/or neighborhoods helping one another)


Source:
1 - NECN

3.31.2010

Preparedness at Work

As I evaluate our family's preparedness, I feel like we're doing pretty well. Like I said in my last post, we are able to roughly maintain a certain preparedness status-quo. I feel so much confidence and peace because I know we could weather many storms because of our storage. However, I have been feeling strongly lately that we have a big hole in one part of my family's emergency preparedness. We each spend so much of every day away from our home. Yet, there are limited preparedness resources when we are at school, work or on the road.

My children's schools are quite close to home. I've made little preparedness packs for my kids' backpacks in the past. And I'm aware that their teachers have kits available for the kids in an emergency. So, I don't feel the need to do more there.

My husband, on the other hand, spends most of the day far away from home. When we did our earthquake scenario for Family Home Evening, I realized that he would be the one most compromised in an emergency. This is the hole in our preparedness plans that I feel strongly about addressing. So, I've been working hard on preparedness packs for him. He works at a local university and I'm aware that they have emergency supplies for the university population for as much as three days. But if roads were closed for any reason, it would be a long walk home. Weather would just make things more difficult.

I'm actually working on two packs, one for my husband's car and one to keep in his office. Thus far I've purchased a rain poncho, flashlight, glowsticks and some granola bars. He already keeps water on hand. I think an umbrella, a change of socks, soap and a small first aid kit need to be included. I also plan on adding some clothes and underwear as well as a blanket to be kept in his office. Extra clothing would give him some options if he was hung up helping at the university. Extra clothing is also not a bad idea generally -- even if not for an emergency that you expect.

Funny Story: My husband called me once from work wanting to know how to resew a seam in his pants. The pants were brand new and must not have had a good knot to hold an essential seam closed. He had discreetly walked to the bookstore, with bag or book in front of the missing seam, purchased a sewing kit, returned to his office and promptly called me. Funnier yet, while he was sitting in his office, on the phone with me, pantless and resewing the seam, the fire alarm went off. As part of the evacuation plans, someone comes through each building opening each office to make sure everyone has left. To say that he sewed those pants up quickly is an understatement. And luckily he was able to get out of the building before someone burst into an unfortunate situation in his office. The new seam on those pants is still holding - if you were wondering.

I'll include a sewing kit in his office preparedness pack as well.

But I digress. What preparations have you made for those who work at locations away from home?

3.26.2010

Ongoing Preparedness

There is no such thing as being perfectly prepared. It's impossible to anticipate every future problem that we will face. It's also impossible to *stay* prepared. There have been small moments in time that I've had everything that has been recommended. But soon enough, water needs to be rotated, food replaced and finances built up. For all of us preparedness is an ongoing process.

Over the past seven years, I have focused a great deal on my own personal home storage. We now have a decent three-month supply, more than 200 gallons of water stored, a financial reserve that could always use some more padding and 9 months of longer-term supplies. But as always, we draw from those reserves. There are quite a few items in my three-month supply that need to be replaced again. And of course, I'm waiting to replace my rice and flour buckets that are still sitting empty in my laundry room.

It's now been several years since I rotated my 55-gallon barrels of water. It's time to replace that water. I'm nervous about some possible contamination from a vehicle spill in my garage that could have compromised a full one-fourth of my water storage.

I recently purchased new clothing for our family 72-hour kits. Yes, it's probably crazy that I was putting *new* stuff into the kits. But after thinking of the many situations in which we might need the kits, I came to the conclusion that regardless of the emergency I would be more comfortable in something nicer than what I had previously chosen to store. I wanted clothing that fit well, was comfortable and would also be durable for work that would likely accompany the use of the kits. I also had come to understand that my teenage son might sit inside a tent or shelter rather than work - because he was too cool to wear the clothing that I stored for him. (I hadn't realized before that teenage boys care a lot more than we realize about these things - even in emergencies.) Unfortunately - or fortunately, My son and I liked our new pants so much that they never made it into our kits. So those pants need to be replaced *again.*

So, I currently have a pretty long catch-up list. I have found the need to plan for those catch-up lists as part of becoming prepared. Sometimes I purchase a little extra beyond my three-months' worth in order to keep on top of my goals as the reserves are being used up. But in the end, at some point, it all has to be replaced, rotated or restocked. Having an awareness of your preparedness supplies, can allow you to constantly replace supplies or you might set up a monthly or bi-monthly routine of evaulating your home-storage.

Instead of thinking of preparedness as an event, I recommend think of it as an ongoing process.

3.16.2010

More for Home-Storage Specialists

Here is a fun handout from Plenty of Picnics with more ideas for home-storage specialists.

My Preparedness Calling


Valerie also has other fun handouts:

First Aid
Sanitation
Family Emergency Plans
Family Emergency Contacts
Emergency Water
Preparedness Organization Planner (inventory, planning, binder sheets).

NOTE - The food storage calculator in the organization binder is based on the OLD home storage program (which can still be applied to longer-term storage). I have not verified the accuracy of the information included in the above handouts.

Click here for iPrepared's past post on ideas for home-storage specialists.

3.11.2010

Home-Storage-Price Dilema

Well, I've had two large storage buckets sitting empty for more than a month now. Typically, when I empty a bucket, I add that item to my grocery list and refill it as quickly as possible. However, when I visited Costco with that intention, I discovered higher prices on both the flour and rice than I remembered. I found myself conflicted with replacing the storage as quickly as I could and trying to find a good price.

In the end, I didn't make the purchase. I know that some of these items are likely to go on sale at our local grocery store in the near future. A "case-lot" sale is scheduled for April and flour and rice prices are typically lowered. But every time I pass those empty buckets, I find myself wondering if I should have just purchased the food stores. Knowing that those buckets sit empty reduces my feeling of preparedness - well, two-buckets-worth.

Was it worth waiting? I'm not sure.

3.09.2010

Powdered Milk Taste-Test


I love this post by Angela at Adventures in Self-Reliance. She got samples of most of the major powdered milk brands, conducted a taste test, and posted her results. She has some great information.

As you can see from her ratings, personal preference varied widely (with a few brands more broadly liked or disliked). As her tasters sampled one of the brands of milk, they were surprised to find out that they didn't like it. Angela writes, "I had some folks about cry when they found out how bad it tasted because that was the only kind they had stored."

Once again, this shows the importance of tasting the powdered milk that you store!

3.01.2010

Home-Storage Specialists

Often in our church congregation you might find someone volunteering as a home-storage specialist. A home-storage specialist doesn't necessarily fall under one organizational umbrella. Consequently, you might have different instructions, goals and/or objectives if you serve in this responsibility. For example, in our own ward and stake, the home-storage specialist falls under the women's organization (Relief Society), but serves the whole ward or stake. In other wards a home-storage specialist might be a called as a welfare specialist, attend ward welfare meeting and work primarily with the Priesthood Quorums and Bishop. Up until recently, I served in the Relief Society Presidency and had some responsibility with the home-storage specialist.

In the past it seems, many home-storage specialists traditionally took orders, gathered money and delivered food storage. Because of tax-exempt issues in our area, we have specifically been asked by our leaders to not take orders or collect money anymore. But there is so much more that a home-storage specialist can do to encourage, teach and model preparedness than just take orders. So, I've included a list of ideas below.


As a HOME-STORAGE SPECIALIST you can:

*Schedule cannery trips. Create car-pooling groups to travel to and from these trips.

*Make arrangements for and educate congregation members about ward/stake home-storage equipment.

*Do "home-storage spotlights" each month in church.

*Include preparedness and home-storage information in ward newsletters, ward bulletins and ward emails.

*Create and distribute a monthly home-storage newsletter.

*Emphasize the *new* program. Too many people don't realize that there has been a change in the way the church is asking us to collect home storage. You could devote several of your spotlights to educating your ward members about these changes. Here it is in a nutshell: 1-Get a three-month supply of foods you regularly eat; 2-Store drinking water; 3-Save up for a financial reserve and THEN 4-Work on your longer-term storage (no longer a one-year supply).

*Pass around sign-up sheets for you to visit homes and help families inventory their current supplies and make goals.

*Help individual families transfer foods, menus, and recipes that they regularly eat into a three-month supply. It may be helpful to turn their menus into lists that can be tracked and rotated.

*Give ideas for Family Home Evening lessons that teach preparedness.

*Draw attention to church-magazine (Ensign) articles that teach home storage concepts.

*Use quotes and information from Priesthood Leaders to instruct and motivate.

*Make members aware of deals. Doing this requires caution and care to preserve the tax-exempt status of the church. Instead of promoting a specific business or sale, you can indicate that December is a good time to buy baking supplies, March to buy gardening supplies, etc. If individuals in your area want to do group orders, you could encourage them to collect orders through community resources instead of at church meetings or through church networks.

*Teach classes (or arrange for teachers to teach classes) to the Relief Society or ward about home-storage concepts including financial preparedness. These classes can be taught as a part of Sunday meetings (as directed by priesthood leaders), additional Relief Society meetings, ward activities, or workshops.

*Invite the ward or stake to a storage "fair" with displays. Include financial, water, and home-storage information.

*Facilitate and teach gardening classes. If space is available, develop a ward garden.

*Become educated yourself so that you can answer questions as they arise. Be aware of current food safety recommendations.

*Counsel with Priesthood Leaders and/or Relief Society leaders in order to understand the priorities that they feel are important to emphasize in your area.

*Educate about ideal storage conditions and packaging.

*Plan and carry-out ward or stake preparedness simulations.


Are you a ward or stake home storage specialist? I would love to hear about your experiences and ideas. Please respond below with your comments.